

Key Takeaways
Why Composting Is Worth Your Time
Composting turns organic waste — vegetable peels, coffee grounds, fallen leaves — into a dark, crumbly material that measurably improves garden soil. For busy homeowners, that's a meaningful payoff for a modest ongoing habit.
Beyond the garden benefit, composting diverts a significant portion of household waste from landfills. Organic material buried in landfills breaks down without oxygen, generating methane, a potent greenhouse gas. Home composting lets the same material decompose aerobically, producing a useful amendment instead.
Whether you're building a vegetable patch or improving a worn-out lawn, compost gives you something store-bought soil conditioners can't fully replicate: a living, biologically active material that supports plant health from the ground up. See our beginner's vegetable garden guide for how finished compost fits into initial bed preparation.
~30%
Household waste that can be composted
The U.S. Environmental Protection Agency estimates roughly 30% of what households throw away is food and yard waste suitable for composting.
4–8 weeks
Time to finished compost (hot method)
Hot composting with regular turning and proper balance can produce usable compost in as little as four to eight weeks.
3:1
Ideal browns-to-greens ratio by volume
Most composting guidance targets approximately three parts carbon-rich browns to one part nitrogen-rich greens as a reliable starting point.
Greens, Browns, and the Carbon-to-Nitrogen Balance
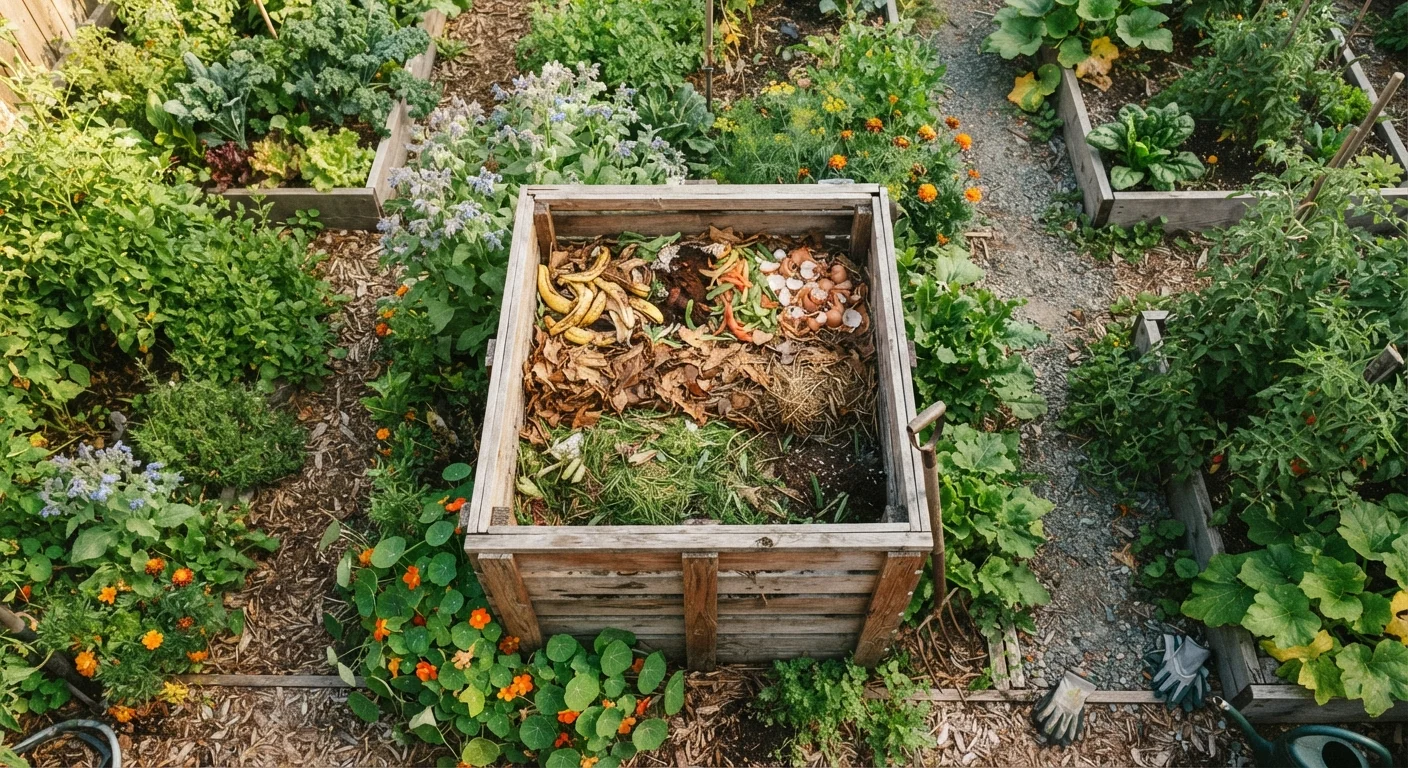
Every compost pile depends on two categories of ingredients, commonly called greens and browns. Greens are nitrogen-rich materials: fruit and vegetable scraps, coffee grounds, fresh grass clippings, and plant trimmings. Browns are carbon-rich: dry leaves, cardboard torn into pieces, straw, and paper bags.
Microorganisms that do the decomposing work need both. A pile with too many greens turns slimy and smells; too many browns and decomposition stalls. A general target ratio is roughly 3 parts browns to 1 part greens by volume — though you'll adjust based on how the pile behaves rather than measuring precisely.
Chop or shred materials before adding them. Smaller pieces expose more surface area to microbial activity and decompose noticeably faster than whole stalks or intact cardboard sheets.
Keep a small lidded container on your kitchen counter for scraps — emptying it every two to three days prevents odors and makes adding to the pile a quick, painless step.
Lowering the friction of the collection habit is often what separates homeowners who compost consistently from those who stop after a few weeks.
Store a pile of dried leaves nearby your compost bin each fall so you always have browns on hand to layer over fresh kitchen scraps.
Kitchen waste arrives year-round but carbon-rich material is seasonal — having a ready supply prevents the balance from tipping too far toward nitrogen-heavy greens.
What to Keep Out of Your Compost
Knowing what to exclude is just as important as knowing what to add. Certain materials either attract pests, introduce pathogens, or simply don't break down usefully in a home pile.
- Meat, fish, and bones — attract rodents and produce persistent odors.
- Dairy products and oily foods — same pest and odor concerns as meat.
- Diseased or pest-infested plants — a cold pile won't kill pathogens reliably; infected material can reintroduce problems to your garden.
- Pet waste — dog and cat feces can contain harmful pathogens not eliminated in typical home composting temperatures.
- Treated wood or pressure-treated lumber sawdust — may contain chemicals unsuitable for food-growing soil.
- Heavily coated or glossy paper — breaks down slowly and may contain inks better kept out of garden soil.
Diseased Plant Material Needs Special Handling
Adding plants affected by fungal diseases, bacterial infections, or insect infestations to a cold compost pile can preserve and spread those problems. When in doubt, bag diseased material and dispose of it with your municipal yard waste rather than composting it at home. Only a reliably hot pile — one that sustains 130°F or higher throughout — provides a margin of safety against most pathogens.
Weeds that have gone to seed are worth keeping out of a cold pile — seeds can survive and sprout wherever you spread the finished compost. A hot compost pile that maintains temperatures above 130–140°F throughout can kill weed seeds, but this requires consistent monitoring.
Choosing the Right Composting Method
There's no single correct way to compost. The right method depends on your space, time, and how quickly you want usable material.
Cold (Passive) Composting
You add materials over time, turn the pile occasionally, and wait. Finished compost typically takes 6–12 months. This approach requires minimal effort and suits homeowners who generate kitchen and yard waste steadily but don't need finished compost on a deadline.
Hot (Active) Composting
Build a pile of at least 3 cubic feet all at once, maintain moisture, and turn it every few days. Internal temperatures can reach 130–160°F, which accelerates decomposition and kills many weed seeds and pathogens. Finished compost can be ready in 4–8 weeks with consistent effort.
Vermicomposting
Worms — typically red wigglers — process kitchen scraps in a contained bin. This method works indoors or in a garage and is well-suited to apartments or homes with small yards. Worm castings (the output) are a highly concentrated soil amendment.
If you're working with raised beds, consider how your composting method aligns with your amendment schedule — our raised beds vs. in-ground planting guide covers soil management strategies for each approach.
Troubleshooting Common Compost Problems
Most composting problems trace back to moisture, aeration, or ingredient balance. Here's how to read what your pile is telling you:
- Pile smells like ammonia
- Too many greens. Add browns — shredded cardboard or dry leaves — and turn the pile to introduce air.
- Pile smells like rotten eggs (sulfur)
- The pile is too wet and anaerobic. Turn it thoroughly and add dry browns to improve drainage and airflow.
- Nothing seems to be happening
- The pile is likely too dry, too small, or too carbon-heavy. Check moisture (it should feel like a wrung-out sponge), add greens, and turn to aerate.
- Pests or rodents
- Likely caused by food scraps added without burying them, or excluded materials (meat, dairy) that were included. Bury fresh additions in the center of the pile and use a bin with a secure base if rodents are a persistent issue in your area.
Check Moisture Before You Turn
Before each turn, squeeze a handful of compost material. It should hold together and feel damp — like a wrung-out sponge — without dripping water. If it's too dry, add water as you turn. If it's too wet, add a layer of dry browns and turn thoroughly to restore airflow.
How to Use Finished Compost
Finished compost looks and smells like rich, dark earth — not like the materials that went into it. If you can still identify food scraps or leaf shapes, give it more time.
Common applications include:
- Soil amendment: Work 2–4 inches of compost into the top 6–8 inches of garden beds before planting to improve structure and nutrient availability.
- Top dressing: Spread a thin layer (½–1 inch) around established plants to feed soil biology and conserve moisture without disturbing roots.
- Lawn improvement: Apply a thin layer to lawns in early fall to improve compacted or sandy soil over time.
- Seed-starting mix component: Mix finished compost with other materials to create a lightweight medium for starting seeds indoors.
Compost pairs well with mulch — while compost feeds the soil, mulch protects it. Our mulch application guide explains how to layer both effectively without creating problems at the soil surface.
Consistent composting, even on a small scale, gradually builds soil that is more drought-tolerant, better draining, and more hospitable to the beneficial organisms that support healthy plant growth. It's one of the most rewarding low-effort habits a homeowner can establish. For a broader look at sustainable home upkeep habits, see sustainable home maintenance habits.
“Healthy soil is not simply a growing medium — it is an ecosystem. Compost is one of the most effective ways a home gardener can support that ecosystem over time.”
— Jeff Lowenfels, Author of 'Teaming with Microbes: The Organic Gardener's Guide to the Soil Food Web'